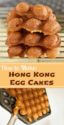
How to Make Hong Kong Egg Cakes (鷄蛋仔)
This post may contain affiliate links where, at no additional cost to you, I receive a small commission when products are purchased through those links. As an Amazon Associate, I earn from qualifying purchases. Any commisions earned helps keep this site sustainable. Click here for privacy policy.
Hong Kong egg cakes are a popular street food in Hong Kong. I first came across these little egg cake as a child growing up in New York City’s Chinatown. From a tiny red stall on Mosco Street, Cecilia Tam churned out pan after pan of these perfectly fluffy and heavenly eggettes for over a decade. This recipe is as satisfying for me as the Cecilia Tam original.
(Also known as Hong Kong egg waffles, Hong Kong egg puffs, or Hong Kong eggettes.)

I’ve been reminiscing about my childhood in New York’s Chinatown where I attended Chinese school every weekend. After class, mom or dad would walk me over to Mosco Street, where Cecilia Tam (aka the Egg Cake Lady) labored in a tiny red corner stall, to buy a bag or two of her legendary Chinese egg puffs (aka eggettes) or 鷄蛋仔 – “gai daan jai” in Cantonese.
Her stall became so popular over the years that there were often more tourists than regulars waiting in line at this “hidden gem”, clutching their cameras and tour books. On weekends, the line would snake around the corner and the wait could be 10-20 minutes or longer.
Here little stall barely fit one person but on busy weekends she would squeeze in a helper to bag and man the extra burners.
Her egg cake mold was a simple metal contraption shaped like two identical tennis rackets and functioned like a square waffle maker but the indentations were egg shaped. And the batter contained eggs – hence why they are called egg waffles.
The egg waffle batter was a glorious golden color and she kept large jugs of it by her feet. She would brush each egg cake mold with oil, pour batter onto one mold, put the matching mold over the batter-filled one and quickly flip the pair so that the batter would fill the other mold and start expanding into perfect little round morsels.
 aka Hong Kong Egg Waffles, Hong Kong Eggettes, Hong Kong Egg Puffs")
I remember her easing the cakes out of the mold with a fork onto a round and scratched up stainless steel pan and how she would jab at the eggettes with steel tongs to separate them and place them into wax-paper bags. She had everything down to timing and order.
Weekends she was always slammed. Weekdays the wait would be nil or only 1-2 people. On slow days, she would have a few waxy bags of egg cakes already filled. They are best eaten hot off the stove so I always asked, and patiently waited, for fresh ones and she always obliged.
With her increasing popularity, and inflation, the price of her egg cakes kept going up throughout the years. So we enjoyed them in less quantities, but we still enjoyed them as often.
At first, her Chinese eggettes were $1 for 20 egg puffs, then $1 for 18, then $1 for 15. Even when imitators popped up around Chinatown selling them at $1 for 20 when Cecilia had further reduced her offerings to $1 for 12, the impostors were not worth paying for the extra portions.
 aka Hong Kong Egg Waffles, Hong Kong Eggettes, Hong Kong Egg Puffs")
Once, pressed for time, we bought some Chinese egg cakes off a street vendor on Canal Street. They were so bland, so disappointing, I vowed I would never buy them from anyone again but from Cecilia, the one and only Egg Cake Lady.
As a kid, I had a special way of eating them. I would first bite off the crispy, crunchy perimeter of each puff and then pop the soft rounds into my mouth. They were perfect in every way – not too sweet, so light, so fluffy, and so worth every dollar.
She closed up shop more than a two decades ago but I have never stopped thinking about her egg cakes when I pass by her little corner where Mott Street meets Mosco.
Williams-Sonoma sold a Nordic Ware Egg Waffle Pan for a while and I was probably one of the first to buy it.
The store no longer stocks the pan but you can find a similar one on Amazon US here or search on Amazon UK here.

How to Make Hong Kong Egg Cakes
First, make the batter. Then preheat your egg waffle pan.
It took some practice to get consistently crispy edges on my electric stovetop. Here’s what works for me:
- Pre-heat the pans for 5 minutes using heat level 4 (my stovetop has heat settings 0 to 6). So I used two burners to preheat both halves at the same time.
- Pour 2/3 cups batter into one of the egg waffle pans, swirl it around to fill some of the empty holes and then secure the other pan on top. Flip immediately.
- Reduce heat to level 3 immediately after pouring the batter and cook two minutes.
- Flip the egg waffle pan after two minutes
- Remove from heat and ease the eggettes off the pan using a wooden fork or silicone utensil (be careful as a plastic utensil will melt and a metal one will scracth the non-stick surface of the egg waffle pan).
Just before I pour the batter into the Nordic Ware egg waffle pan, I apply a thin layer of vegetable oil with a pastry brush.
UPDATE 5/25/2020: I now use cooking spray like PAM and lightly spray each side before pouring the batter. I had avoided doing this in the past because I read that cooking sprays cause oil build-up on non-stick surfaces that are impossible to wash off. After owning my pan for 15+ years, I was ready to test that theory out. For the last 5 batches, I have been using cooking spray and afterwards immediately soaking the pans in hot soapy water and washing them. The pan is easy to clean and no sticky residue. So far, so good!
But be sure to test out a small section of your pan first – I don’t want you to ruin yours!
So it would seem that for my oven, heating it at a higher temperature helped create the crispy crunchy edges that I love and then reducing the temperature down a notch prevented burning. You’ll have to experiment with your gas or electric oven to find the equivalent settings.
You can hear from my video below how crunchy these are on the edges. My kids and I cannot stop eating them:
The texture is perfect – crunchy around the edges and I love nibbling all the crispy bits that surround each puff before moving on to the soft middle – and with each bite, I am transported back in time, smiling at nostalgic memories.
I’m sure time erodes taste memories, but I really do feel that this recipe resembles what I remember from my childhood days.
If you own one of these pans, be sure to wash it when it’s submerged under water so that you don’t end up a soaking mess like I did and a soft-bristle brush like this Oxo one works great for getting out all the dried-up batter from the crevices.

If you enjoyed making this recipe, then also check out my tutorials for making Ramen Noodles (the no-knead easy way), Chinese egg noodles, and for making silky-smooth slurp-worthy Udon Noodles (using a non-traditional ingredient).
How to Make Your Chinese Egg Cakes Even Better!
Soon after buying the Nordic Ware egg waffle pan, I started experimenting with the batter. Initially, I made a batch of Chinese eggettes using fresh custard (made from milk and eggs). But the taste and consistency wasn’t right.
Now I use custard powder and just throw everything into my Kitchen Aid stand mixer, turn it on and voila! Batter done. No need to heat up milk nor temper eggs to make custard, etc., etc.
A few weeks back, I whipped up a couple batches to experiment with altering the ingredients and found that using either tapioca starch, potato starch, corn starch or custard powder worked just fine. However, using custard powder did give the eggettes a richer vanilla taste since custard powder is essentially vanilla-flavored corn starch.
For those experiments that didn’t use custard powder, I doubled the amount of vanilla extract (or essence) from one teaspoon to two teaspoons.
I think an essential ingredient for the batter to taste right is evaporated milk. I had never used evaporated milk before and I was curious to try the different brands. I decided to try a few of them…just for fun. And was glad that I did.

The best tasting batch I found was made using Rainbow “Gold.” I think it gave the eggettes a richer, fuller flavor. Even the label reads: “Richer and Creamier.” Unfortunately, Rainbow Gold is no longer available.

I tried omitting vegetable oil from the batter but that wasn’t a huge success as the final product came out too dry. So be sure not to leave out the oil.
I also made batches pitting vanilla extract versus vanilla essence. Perhaps it was all in my mind or I’m just biased in thinking that anything with alcohol tastes better because I thought the batch with vanilla extract tasted better than the one with vanilla essence. (Click here for alcohol-free vanilla extract.)
However, vanilla extract is not available in the UAE as it contains alcohol. I have a precious stash of two bottles that I hope will last me until the next out-of-town visitor arrives to replenish it.

I hope you found this post useful and that the future brings you lot of yummy little morsels of Hong Kong Egg Cakes!
Also check out my tutorials for making Ramen Noodles (the no-knead easy way), Chinese egg noodles, and for making silky-smooth slurp-worthy Udon Noodles (using a non-traditional ingredient).

Hong Kong Egg Cakes (Gai Daan Jai – 鷄蛋仔)
Ingredients
Method
- In a large bowl, mix together the flour, baking powder, tapioca or corn starch, and optional custard powder with a spoon or fork. You can also sieve these dry ingredients but I didn’t bother.
- Add the eggs, sugar, vegetable oil, and vanilla extract/essence. Give it a whirl with an electric mixer (start at low speed so the flour doesn't erupt out of the bowl and increase to medium speed) or spatula. Alternatively, mix by hand with a wire whisk.
- Pour in the evaporated milk and water. Mix thoroughly.
- It may be slightly lumpy and this point and I found that letting it stand for an hour (whether in room temperature or fridge) helped dissolve the lumps.
- Set a wire rack on a baking sheet or large plate.
- Pre-heat each half of the Nordic Ware Egg Waffle Pan on separate burners over medium-high heat until hot. I pre-heated mine for 5 minutes.
- Lightly brush or spritz each pan with vegetable oil. Lower heat to medium.
- Pour ¾ cup of the batter into the middle of the egg waffle pan (if you pour too much, it will either leak out the side or prevent the waffle pan from closing tightly) and give the pan a quick swirl to distribute some of the batter to the outer holes.
- Immediately place the other side of the pan on top, flip the pan over and cook for 2 to 2.5 minutes.
- Flip again and cook for a further 2 to 2.5 minutes. Exact timing will depend on your stove and heat output.
- Open the pan and invert the eggettes onto the wire rack and let cool for a minute or so. I used a plastic fork to help loosen the egg cakes from the mold.
- Repeat with the remaining batter. Enjoy!
Notes
-Makes 2 cups of batter and 3 batches of eggettes.
This post was originally posted on Jan. 22, 2012 and last updated on May 28, 2020.
Subscribe to my monthly newsletter and receive a FREE noodle guide PDF:

*We respect your privacy and will not send you spam. You may unsubscribe at any time.
I came across this rtecipe in a Maths Revision session. One word- IMPRESSED! I yearn for eggettes day and night and this recipe ticks every box in the book. However i have a criticism. There is no way i can make it to the egg cake lady in NYC in time to come back for my Maths paper 2 exam tommorow. (not to mention my cold war paper in the afternoon). Putting this aside, the eggettes look fab.
Many thanks,
Eggette lover and counissour
XOXO
I, too, would get these as a treat after Chinese school!
I learned about Hong Kong egg waffles on an episode of the Bizarre Foods TV show and had to try them! I don’t have a bubble waffle pan so I used my Belgian waffle maker. The waffles turned out pretty dense and reminded me of French toast! So delicious and flavorful, very different from other waffles I’ve had. You definitely gotta use the custard powder and tapioca starch in this recipe to achieve the best results. Maybe I’ll invest in a bubble waffle maker at some point to get the texture just right! I’m sure they would be lighter and crispier with the correct waffle maker.
Omg I remember a fellow Filipino friend introducing me to her delicious egg cakes and the iconic red stall when I was in high school in the late 90s! I remember it was 12 for a dollar and always getting 2 bags, one to “take home”…but of course the bags never even made it to the train or car LOL! I remember as time went on, whenever I was in Chinatown, I would look to see if she was there but sadly, stopped seeing her around… makes sense if she closed up shop in the early 2000s. I came across your post because i just tried some very sub-par ones from a trendy asian dessert place (they were $7.00 for maybe less than 20 ?) and with this core memory unlocked, figured I’d Google her. I still think of her when I’m in or near Chinatown! You described her process perfectly, the exact way I remember it with the fork to get them out of the mold and the brush of the oil! LOL thanks for the recipe, I’ll have to try it out! <3
Very authentic and easy recipe to whip up. I have a non electric egg waffle maker and I put it over our gas stove. Had to calibrate the heat output and not burn. Still trying to get the right amount of batter and the swirling so the eggettes come out hollow in the middle—as I recall that’s how many HK egg waffle vendors made them. Thank you for sharing this recipe.
I am also still working on my swirling technique. Always a work in progress 🙂
I bought an electric egg waffle maker as something new to try at the beginning of quarantine. I’ve used this recipe many times since, it’s so good!! Thank you so much.
my son found this recipe and made them in our waffle iron. He misses Cecilia Tam’s egg cakes so much – we visited regularly and walking around with that little wax paper bag of heaven was a joy. This recipe is it! They don’t need any embellishment – eaten plain they gave us wonderful memories. We made them again in an abelskivver pan and they worked! But I’m going to get the Nordic ware bubble pan. These are going to be a regular on our dessert menu. Thank you!!!!!
I am so glad you loved this recipe! We also tried this in our regular waffle iron and it did come out tasty but I have to say that I prefer the Nordicware bubble pan for the nostalgia and also eating little eggettes is more fun than a big waffle 🙂
We’ve had these in Hong Kong and made them at home with an electric waffle iron. I tried this recipe because it only called for two eggs. The recipe I used to use called for six egg whites and 3 yolks. Plus you had to beat the egg whites.
This recipe is the best!!! I used half-and -half instead of evap milk. Used tapioca starch and vanilla pudding mix for the custard powder. It has the flavor of the original. The only issue we had was with our waffle iron–didn’t always brown evenly. But even the duds were delicious.
That looks amazing information. Thanks for sharing and love your site
Great recipe! They were yummy! I have a Nordic ware bubble waffle pan that I think I have finally figured out.
Truth be told, any of my nonstick pans, to include the waffle maker, only get a hot water wash, scrape, and dry. Soap is a no-no on non-stick.
Stumbled upon your recipe bc I was looking for something akin to Mosco street lady. Thought you wold enjoy this article on her from back in the day. https://www.nytimes.com/1994/12/11/nyregion/new-yorkers-co-the-egg-cake-lady-of-mosco-street.html https://www.nytimes.com/1994/12/11/nyregion/new-yorkers-co-the-egg-cake-lady-of-mosco-street.html
Made these today, first time making them, didn’t have evaporated milk or cornstarch so used corn flour and single cream, nice waffles and glad it makes a small amount.
I regularly make egg waffles, always with the same recipe. And they’re perfect because they’re as crispy as the ones I can buy to street sellers in Hong Kong.
Today I tried your recipe and I’m very disappointed.
The batter is way too liquid, too sweet and makes moist/soft waffles.
Luckily I could only make 6 waffles with these proportions so we didn’t have to force ourselves too much to finish it.
I think the recipe should have more tapioca starch and more condensed milk.
I’d be happy to share the recipe I use and that works.
?Hi!
Thank you for your feedback. And sorry to hear you were disappointed.
We Love these egg waffles and just made them yesterday and you can hear from the IG video (link below) that my recipe does not come out soft or moist at all but crunchy on the outside and soft in the inside. Just the way we like them.
I would imagine that we adapt ourselves to each recipe so if your recipe works great then stick with it and thank you for taking the time to try mine ?.
https://www.instagram.com/p/B-oNi1Tpx25/
Best Regards,
Sandy
Thank you for this. I was a federal employee back in the 1980s and would travel to the real Chinatown weekly for visits to Big Wong’s and the ONG KONG red metal egg waffle shop. I think that you nailed the receipt . Things were great back then. Thank you for restoring an important part of that history.
Hello, Ginger, I just found your great website. I am excited to try these bubble waffles. Can you please tell me where I might purchase the Rainbow Gold condensed milk? Thank you for taking the time to put this all together.
Im wondering is tapioca starch completely optional? I’ve been experimenting for a few weeks now to the point where I’m making 4 egg waffles a night lol
I’ve also tried making a few batches without the custard powder but I ran into issues where the inside of the eggette was only cooking to 70% so I’d have a small air pocket where it didn’t fill.
My next batch I might try 2 tbsp of custard powder or just stick with the original which is 1 tbsp each of tapioca & custard powder.
I’ve tested your recipe with an electrical bubble waffle maker and found that it was way easier to remove from the grill plates due to the amount of oil being used. I originally used 1 tbsp but found it wasn’t enough since my next waffles would get stuck 🙁
Can’t wait to try this! My girls love these . If u ever know anyone going to Mexico get them to get u a litre bottle of vanilla!!!
Can help me to have abozo pastry recipe? Thank you
Thank you so much for ur post. I am trying to make this egg waffle and your post helps me a lot. However, I cannot find evaporated milk, so do you know with what I can replace evaporated milk? Or can i just do it without milk?
Thanks.
Hi Phuong, while you can, in theory, use regular milk (or any other liquid for that matter) to replace the liquid portion of evaporated milk but the taste will not be 100% the same as the original recipe. You can also google how to make evaporated milk and home – I believe it’s just regular milk simmered down to a very small quantity.